 Using these 10 hidden iPhone features will make your iPhone experience more productive and valuable:
- Choose Waze vs. Google Maps
- Show message send times
- Use Wi-Fi Assist
- Set app tracking for privacy
- Change the iPhone flashlight brightness
- Long press for top-level domain names
- Dial an extension for a telephone number
- Snap a photo during a video
- Slide to type
- Extend your battery life
 Waze vs. Google Maps |
 Show message send times |
 Use Wi-Fi Assist |
|
Set app tracking for privacy |
 Change flashlight brightness |
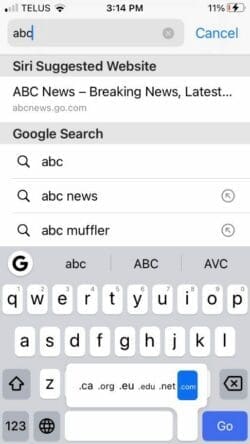 Long press for top-level domain names |
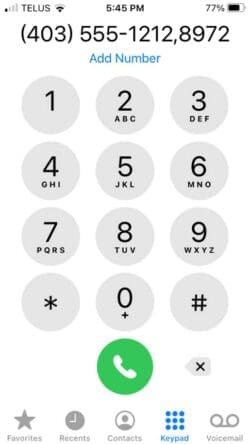 Dial an extension for a telephone number |
 Snap a photo during a video |
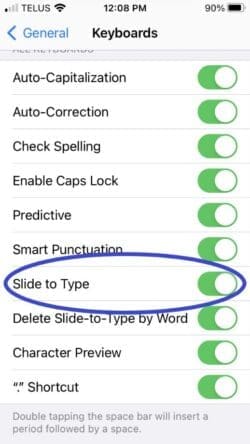 Slide to type |
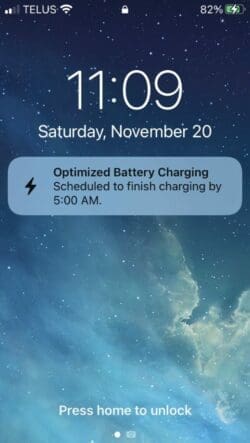 Extend your battery life |
Choose Waze vs. Google Maps
How do you decide between Google Maps and Waze? Both are highly functional apps.
Waze prioritizes minimizing your time on the road to reach your destination as quickly as possible. That results in Waze sometimes suggesting unusual but highly effective time-saving routes. Waze is more aggressive about shaving minutes off your total driving time than Google Maps.
Waze relies on live data from other active users on the road to navigate around delays. This feature is its most significant advantage over Google Maps. However, if there aren’t other Waze users near you or you lose cell service, you won’t receive any up-to-date information on the roads. At that point, you’ll lose the unique aspect of Waze that makes it special.
Google Maps supports public transportation, walking, cycling, and driving for your route. Waze offers nothing like that because it focuses solely on roads.
Waze and Google Maps both consume lots of cellular data. Waze uses even more because its advantage depends on receiving user-submitted information.
Google Maps offers richer data about businesses and services along your route than Waze.
To read a much more extensive discussion of the differences, click here.
Show message send times
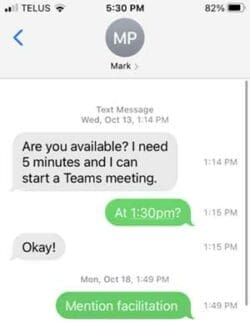
Ever needed to know the exact time that messages were sent?
Follow these simple steps:
- Launch your Messages app.
- Tap on the message thread where you’d like to view timestamps.
- Slide your finger from right to left.
Now you can see the timestamps for each message.
Use Wi-Fi Assist
Are you dropping FaceTime calls because you lose a Wi-Fi signal?
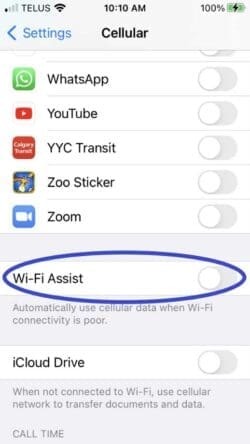
Turning on the Wi-Fi Assist function allows your iPhone to automatically switch to the cellular connection when the Wi-Fi network signal disappears. Despite its name, Wi-Fi Assist consumes cellular data.
Here’s how to turn on Wi-Fi Assist:
- Launch your Settings app.
- Tap Cellular.
- Swipe way down until you see Wi-Fi Assist.
- Tap to enable.
Wi-Fi Assist works for all apps such as Safari and iMessage that require an Internet connection, provided you have enabled Cellular for the app in question.
Be cautious about using Wi-Fi Assist too much because it can cause your iPhone to rack up overage charges on your phone bill. Your iPhone will display data consumption where you enabled Wi-Fi Assist.
Wi-Fi Assist will revert to Wi-Fi if you wander back into network range.
Wi-Fi Assist doesn’t kick in when the signal is marginal or poor and it doesn’t somehow boost the available Wi-Fi signal, despite its name.
How much privacy does your iPhone offer? Can you increase your privacy?
Earlier in 2021, Apple instituted a new App Store policy that limited apps’ ability to track user behaviour without receiving express permission from you first.
This change has made accurate targeting of advertising to iPhone end-users more difficult for Facebook, Google and other social media companies. The change threatens their revenue because it limits their ability to collect the mountains of data about us that they use for targeted ads.
This seemingly small change to introduce permissions is a big deal because only about four percent of iPhone end-users give permission.
To turn tracking off for all apps, follow these steps:
- Launch your Settings app.
- Tap on Privacy.
- Tap on Tracking.
- Tap “Allow Apps to Request to Track” to off.
If you leave the setting on, every app will prompt you about tracking the first time you launch the app. Responding to these prompts means you can select which apps you will allow to track you.
For an in-depth discussion of iPhone privacy features, click here.
iPhones produce a 7-day App Privacy Report if you turn on Record App Activity under Privacy.
Change flashlight brightness
Is your iPhone flashlight indispensable for searching under cinema seats for dropped car keys or looking into nooks and crannies?
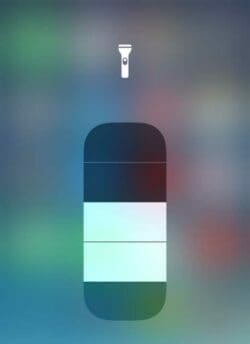
The brightness of your iPhone flashlight is fully adjustable with these steps:
- Swipe up on the Home screen to open the Control Centre.
- Tap the flashlight icon to display the options.
- Slide your finger up or down to select the brightness level.
Long press for top-level domain names
Are you tired of laboriously typing out top-level domain names for websites you want to visit? Do you use unusual versions of some letters?
Here’s how to access keyboard shortcuts:
- Press and hold the”.” key beside the space bar on the soft keyboard.
- This action will display the list of available shortcuts for your convenience. Tap the one you want.
This long press also works for other keys where multiple versions of the letter or symbol exist, like the $ currency sign.
Has trying to dial an extension on your iPhone frustrated you?
Here are the steps to follow:
- Launch your Phone app.
- Enter the main number you’re calling.
- Hold down the * button at the bottom left of the number pad until a comma appears. Don’t worry; the * will disappear.
- Enter the extension number after the comma.
- Press the Call button.
Snap a photo during a video
Have you ever wanted to grab a photo while recording a video?
While recording a video, you’ll see another button to the left of the record button. Tap this button gently to take a quick photo without interrupting your recording.
Be careful not to jiggle your iPhone when taking the photo.
Facetime has the same quick photo button and notifies all parties in the video that a photo was taken.
Tired of pecking away at your soft keyboard one letter at a time?
With the iPhone’s new QuickPath feature, you can “type” on your soft keyboard by sliding and holding your finger or thumb briefly on each letter of the word you’re trying to spell. The word will appear in the middle of the phrase bar above the keyboard. When it does, let go, and the word will move to your text. Now you’re ready to spell out the next word quickly.
There’s nothing to set up, enable, or install to use QuickPath; it’s already a feature in your soft keyboard.
To further configure your keyboard, follow these steps:
- Launch your Settings app.
- Tap General.
- Tap Keyboards.
- Enable or disable the various functions offered.
Screenprints don’t adequately describe the capabilities of QuickPath. Click here to view a video created by Apple Support.
Extend your battery life
Can you extend your iPhone’s battery life to avoid the cost of a replacement?
iPhones have a new Battery Health feature called Optimized Battery Charging. It’s designed to extend your iPhone’s total battery life.
The charging feature slows charging your battery past 80 percent to a time when you don’t use your phone. The software learns your daily routine and schedules final charging for the time when you’re not using your phone, typically at night.
That way, you will have the whole battery available, but your iPhone won’t have to hold a 100 percent charge for several hours. It’s operating with an extended 100 percent period that degrades your battery.
Here’s how to set up optimized battery charging:
- Launch your Settings app.
- Tap Battery.
- Tap Battery Health.
- Enable Optimized Battery Charging.
Some question how much Optimized Battery Charging actually achieves in extending the iPhone’s total battery life because we tend to buy a new iPhone about every three years. For those of us who don’t want a part-time job micromanaging our battery percentage all day and every day, a pragmatic, low-effort strategy appears to consist of:
- Don’t store your iPhone on your wireless charger all day.
- Only charge your iPhone during the day when the battery percentage falls well below 50 percent.
- Charge your iPhone using the Optimized Battery Charging feature every night.
Yogi Schulz has over 40 years of information technology experience in various industries. Yogi works extensively in the petroleum industry. He manages projects that arise from changes in business requirements, the need to leverage technology opportunities, and mergers. His specialties include IT strategy, web strategy and project.
For interview requests, click here.
The opinions expressed by our columnists and contributors are theirs alone and do not inherently or expressly reflect the views of our publication.
© Troy Media
Troy Media is an editorial content provider to media outlets and its own hosted community news outlets across Canada.

